Friday, March 15, 2013
Balloon in a bottle
This is a great demo for making air pressure dramatically visible.
The "bottle" is a special flask with a hole in the bottom. Stuff most
of a limp balloon into the neck of the flask, mount the balloon's neck
onto the flask's neck, and inflate the balloon. When you take your
mouth off the balloon, it deflates, of course. Ask your audience to
predict what will happen if you put the stopper in before taking your
mouth off. Now inflate the balloon again, insert the stopper in the
hole at the bottom of the flask, take your mouth off, and TA-DA! The
balloon does not deflate, despite having its mouth held wide open by
the neck of the flask! This is really an astounding demo, and people
are delighted every time I do it.
The key to understanding this is that inflating the balloon pushes air
out of the flask through the hole in its bottom. With no stopper, air
rushes back in through the same hole when the balloon deflates. But
with a stopper, pulling air back in to the flask is not possible. As
soon as the balloon deflates just a tiny bit, the same amount of air
in the flask must occupy a larger volume, which means it lowers its
pressure. Each square inch of latex in the balloon's surface now
starts to feel a higher pressure from the inside of the balloon than
from the outside of the balloon, so it can't deflate any more.
(Experts: I am purposely omitting surface tension to keep it
simple for a young audience.) If you now remove the stopper, it
quickly deflates by drawing air into the flask through the newly made
hole.
There are further variations such as pouring water in the balloon
before removing the stopper (which creates a nice squirt of water when
you do remove the stopper).
If you can't find this specialized flask, you may be able to do a
similar demo with a regular bottle by using a straw in parallel with
the balloon to vent the bottle as you inflate the balloon. From the
videos I've seen, it takes some dexterity and practice to do this and
remove the straw to prevent further air flow at the critical moment,
but it is doable.
I did this Tuesday with the upper-graders at Peregrine School to
introduce pressure to our study of weather. Pressure is related to
temperature; pumping up a bike tire shows that compressing a gas
raises its temperature, and there are demos I will describe in a
future post which show how cooling a gas makes its pressure drop. So
hot air masses are associated with high pressure, and cool air masses
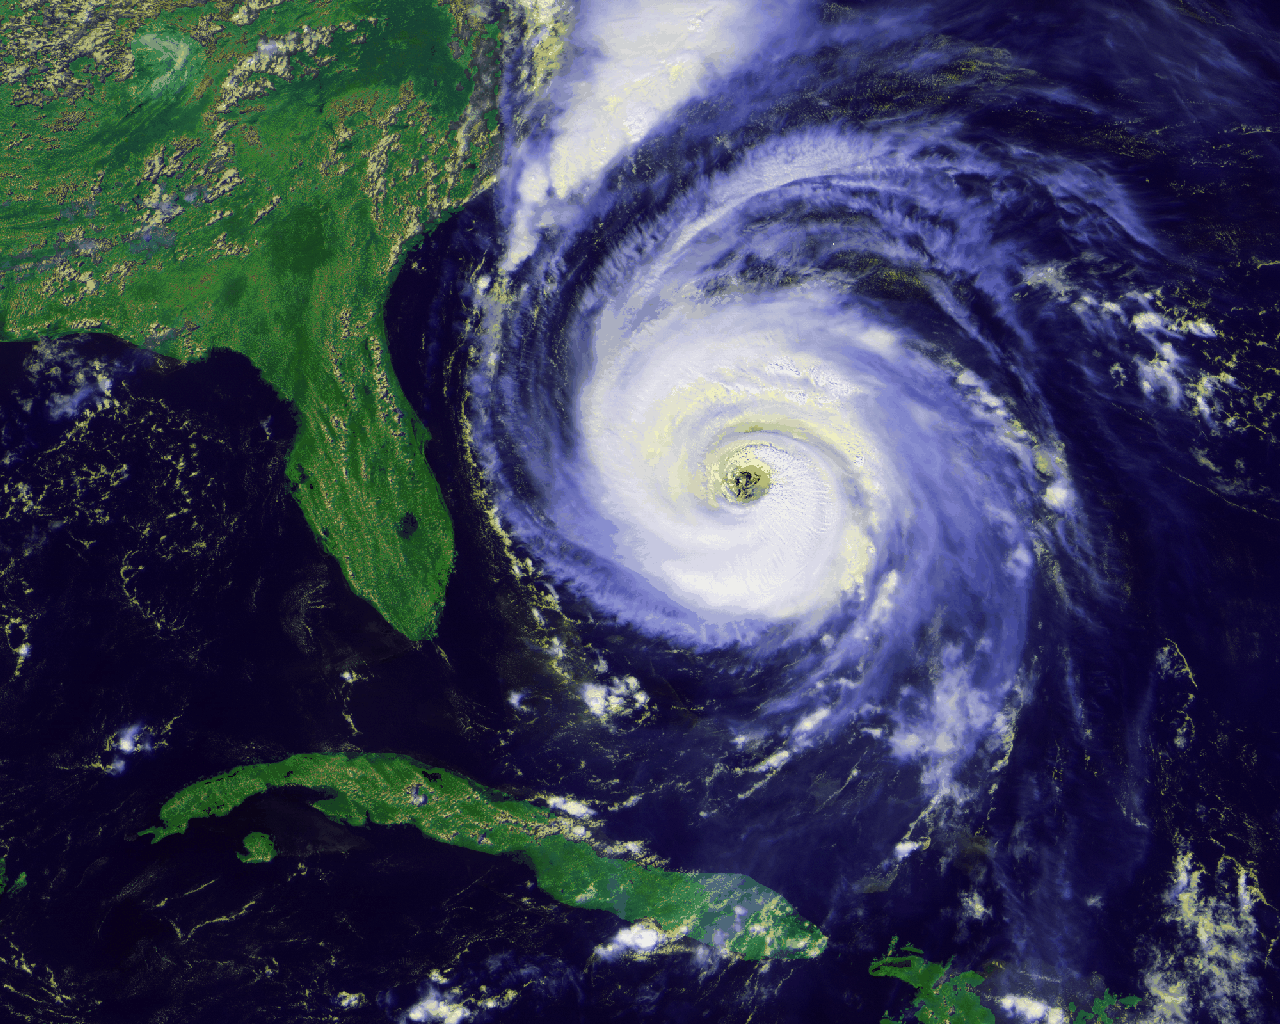
(and storms) are associated with low pressure. In low-pressure storms
like hurricanes, air is pushed from higher-pressure regions on the
periphery toward the center. Combining this with what we had just
learned about the Coriolis effect, we see that in the northern
hemisphere air will be deflected to its right, making a
counterclockwise circulation which is easily seen in satellite images:
In the southern hemisphere, air is deflected to its left as it tries
to go from outskirts to center, thus creating clockwise circulation.
We saw in our previous activity that the Coriolis effect cannot
determine the circulation in toilet bowls because a few inches' travel
is too small to be affected by riding on the 12,000-mile
merry-go-round we call Earth. But over hundreds of miles, the
Coriolis effect does build up and cause these wind patterns.
The next and last activity in our physics-behind-the-weather extravaganza was making clouds.
Subscribe to:
Post Comments (Atom)

No comments:
Post a Comment